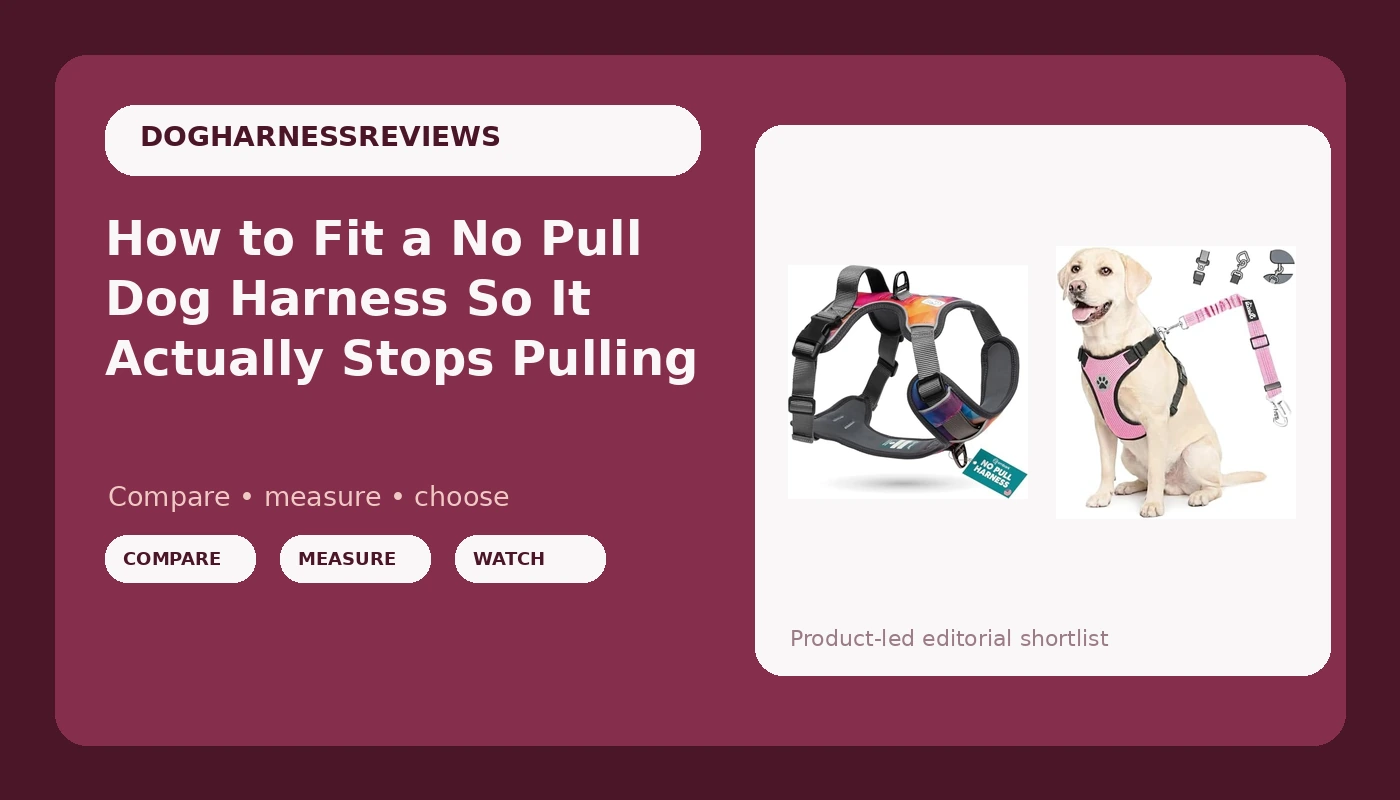
Most dogs who pull do not need a new harness. They need the one they already own put on correctly, with the leash attached at the right point and the straps sitting where they can actually redirect forward motion. A no pull dog harness is a lever. Like any lever, it only does work when it is placed at the right point on the load, and most harnesses I see on the street are placed wrong by two to three inches.
I have fitted more than 3,000 dogs with harnesses, first at a shelter working with reactive and hard-pulling dogs, and now through my own training business in Portland, Oregon. The failure pattern almost never changes. An owner buys a reasonable harness, puts it on the way the box photo shows, watches the dog drag them down the block anyway, and decides the product is junk. Usually the product was fine. The fit was not, and the leash was clipped to the wrong ring.
This is the fitting procedure I walk every client through. It takes about ten minutes, it works on almost any adjustable harness, and it is the difference between a training tool and a piece of nylon your dog wears to the park.
Why you should trust me
I have been fitting dogs for over a decade, eight of those years at a shelter where the dogs were not polite on leash and I did not get to choose them. I keep a shelf of more than 30 harnesses that I have tested to destruction: washed a hundred times, yanked on with a leash pop, worn by my own two German shepherds. I measure strap width, I check whether the D-rings are metal or plastic, and I watch how long the padding stays where it was sewn. Fit is about 80 percent of the outcome. The other 20 percent is whether the hardware survives a dog that lunges.
I do not review prong collars or shock collars. Different philosophy, different article.
How I picked and how I tested
Everything below is about getting a harness to do its job, not about which brand has the best photography. The two products in this guide are the ones I hand clients most often: one for walking, one for the car, because most dogs need both and the industry pretends one harness does both jobs.
For the walking harness I checked the fit points that actually matter. Where does the chest strap cross the sternum? Does the neck opening clear the windpipe when the dog hits the end of the leash? Do the adjustment sliders hold after a walk, or do they creep back to factory length? Does the padding stay put after a wash, or does it bunch up under one strap and leave the other bare? I put it on three body types, a deep-chested shepherd, a barrel-chested bully mix, and a skinny adolescent that is all legs, because a harness that only fits one shape is a harness sold in one size with extra steps.
For the car harness I checked the same things plus one more: whether the seatbelt path keeps the dog from turning into a projectile, and whether the buckle releases fast when I need it to.
The rules I trust are simple. Two fingers should slide under every strap, no more. The chest strap sits above the point of the shoulder, not across it. Armpit clearance is the one people get wrong, and it is the one that rubs hair off.
The two harnesses I hand clients first
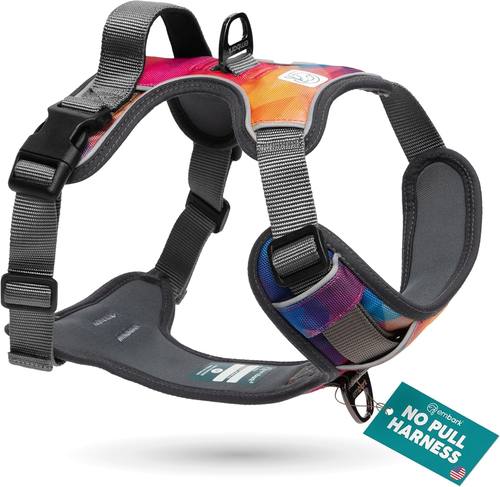
Walking and training harness: Embark No Pull Dog Harness, Reflective Adjustable Training Vest, No Choke
 Visit on Amazon →
This is the harness I start most pullers in. It is a training vest cut, so the straps are meant to be adjusted rather than worn at whatever length the factory set them to, and the no-choke design means the neck opening is not going to close down on the windpipe when a dog hits the end of the leash. The reflective trim matters more than people expect in a Pacific Northwest winter, when it is dark at 4:30 in the afternoon and every walk happens under streetlights.
The adjustable range is the reason it goes on three different body types without a return. I set the neck strap first, then the chest strap, then the girth strap, in that order, and I re-check all three after ten minutes of walking.
Flaws but not dealbreakers: Adjustable means adjustable. If you set it once and never touch it again, it will drift and the fit will slide. Plan on a two-minute recheck at the start of every walk for the first week.
Anyone with a dog that pulls, lunges, or coughs on a flat collar should start here.
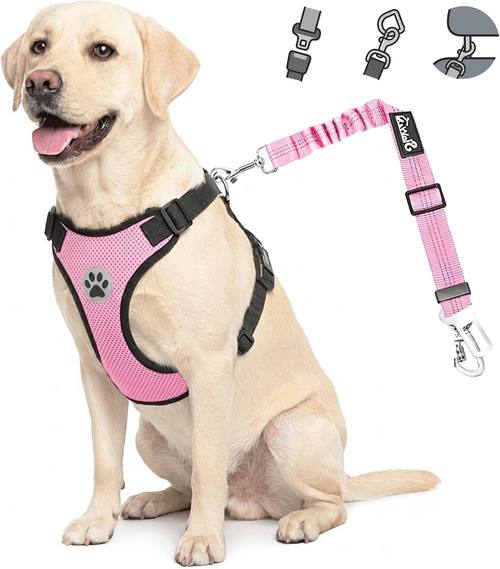
Car harness: Lukovee Dog Car Harness Seat Belt, Harness & Seatbelt with 2 in 1 Buckle
 Visit on Amazon →
A walking harness and a car harness are not the same tool, and this is the one I keep in the truck. It is a harness and seatbelt in one piece with a 2 in 1 buckle, which means the dog rides clipped into a restraint instead of loose on the back seat. If you have ever braked hard with a 60-pound dog in the cargo area, you already know why this exists.
The fit rules change in the car. It should be snug enough that the dog cannot twist out of it, the straps should lie flat with no edge rolled over, and the seatbelt path needs to sit low on the chest rather than up on the throat. I check it every time I load a dog, because a harness that fits in the driveway can shift once the dog lies down and turns around.
Flaws but not dealbreakers: A car harness is a restraint, not a crash-tested safety seat. It keeps your dog from climbing into your lap and becoming a distraction. It does not turn your sedan into a crash cage.
Anyone who drives with a dog loose in the car should have one of these in the door pocket.
How to fit a no pull dog harness, step by step
Step one: Measure before you buy. Run a soft tape around the widest part of the chest, right behind the front legs. That girth measurement is the number that decides the size. A neck measurement alone will get you the wrong harness every time. If your dog lands between two sizes, size up on a training vest with real adjustment range, not down.
Step two: Loosen everything first. Before the harness goes near the dog, back every slider off to its widest setting. Snapping a tight harness over a dog's head teaches the dog that the harness is a trap, and you will spend a month undoing that lesson.
Step three: Set the neck opening. Slide it over the head or step the paws in, whichever the harness is built for. The neck strap should sit high, near the base of the skull, with two fingers of clearance. If it slides down onto the shoulders it is too loose, and if it presses on the throat it is too tight.
Step four: Set the chest strap. This is the strap that crosses the front of the chest, and on a no-pull design it is the one doing the redirecting. It should cross the sternum at roughly the height of the chest bone, well above the point of the shoulder. If it sits low, the dog can pull straight through it. If it rides up into the throat, the dog will cough.
Step five: Set the girth strap. Snug, two fingers of clearance, sitting behind the ribcage rather than on the last rib. This is the strap that keeps the whole harness from rotating when the dog pulls sideways.
Step six: Check the armpits. Slide a finger under the strap where it passes the front leg. If the strap is sitting in the armpit crease, tighten the girth strap a notch and loosen the chest strap a notch. This is the most common fit error I see, and it is the one that rubs the fur off and leaves a raw spot after a long walk.
Step seven: Clip the leash to the right ring. On a pulling dog, the leash goes on the front attachment point at the chest. That is what turns forward momentum into a gentle turn. A back clip on a dog that pulls is a sled dog setup, and no amount of training beats the physics of it. Save the back ring for sniffy walks with a dog that already walks politely.
Step eight: Walk ten minutes, then re-check everything. Dogs settle into a harness the way you settle into a new pair of boots. Every strap will have moved. Re-check the neck, chest, girth, and armpit clearance, then leave it alone for the rest of the walk.
The mistakes that ruin a good harness
Sizing up to be safe. A loose harness rotates, the chest strap slides down onto the shoulders, and the no-pull geometry stops working. Loose is not kinder. Loose is a harness that rubs.
Leaving it on all day. A harness is work equipment. Put it on for the walk, take it off after. Dogs that live in a harness get matted fur under the straps and a permanent dent in the coat.
Clipping under the armpit. If the leash attachment ends up in the armpit crease when the dog pulls, the fit is wrong, not the leash. Fix the chest strap height first.
Trusting a plastic buckle on a big dog. I have watched a plastic buckle pop open on a leash pop from a 70-pound shepherd. Metal buckles and metal D-rings are worth paying for on any dog over 40 pounds. On a small dog a plastic buckle can be fine, as long as the fit is right.
Assuming the harness will train the dog. It will not. A front-clip harness makes pulling uncomfortable and unproductive. It does not teach the dog what to do instead. That is your job, and it takes treats.
What to do after the harness is on right
The harness buys you leverage. Use it. Reward the dog for walking beside you, in position, before the leash goes tight. Change direction when the dog surges instead of pulling back against the leash. Stop and stand still until the leash goes slack, then move again. Ten minutes of that, three times a day, does more than an hour of being dragged around the block.
A no pull dog harness makes the wrong behavior harder and the right behavior possible. It does not make the decision for the dog.
What this all costs
Two harnesses, one for walking and one for the car, will run you less than a single vet visit for a neck injury. Check current Amazon price on the Embark for the walking harness and the Lukovee for the car setup, and budget for the possibility that you need a second size in six months if you have a puppy.
The expensive mistake is not buying the wrong harness. It is buying three of them because nobody measured the dog's chest before the first order. Measure once, set every strap with two fingers of clearance, re-check after ten minutes, and the harness you already own will start doing the job it was sold to do.