Most people buy a no-pull dog harness, clip the leash to the front ring, and then spend the next month wondering why the dog is still towing them down the sidewalk. The harness is almost never the problem. The fit is.
A front clip only redirects a dog when the strap sits across the chest at the right height, the girth strap stays behind the ribcage, and the whole thing holds its position through a hard lunge. Get any of those wrong and you have paid for a piece of nylon that behaves exactly like a collar, except with more places to rub.
I have fitted more than 3,000 dogs with harnesses, most of them at a shelter where the dogs pulled hard enough to lift me onto my heels. The pattern never changes. The owner blames the product, and the product was two inches off. What follows is how to measure, adjust, and check the fit points that make a no-pull harness actually work, and the two harnesses I hand to most clients when they ask me what to buy.
Why you should trust me
I spent eight years at a shelter working almost exclusively with reactive and pulling dogs, and I now run my own training business in Portland, Oregon. I keep a shelf of more than 30 harnesses that have been washed, yanked on, and worn by my own two German shepherds. I measure strap webbing width, check whether the hardware is metal or plastic, and watch how long padding stays where the manufacturer put it. If a harness rotates on the dog, I want to know why before I recommend it to anyone.
How I judge a harness, and what I ignore
Four things decide whether a harness is worth your money.
Hardware. Buckle quality is the whole product. I have seen a plastic buckle burst on a leash pop from a 60-pound dog. On anything over 40 pounds, I want metal, or at least a buckle that was engineered for load rather than for looks.
Strap webbing. Thin, slick webbing slides through adjusters and lets the harness rotate under tension. Wider webbing with a tighter weave holds a setting.
Front clip geometry. A front attachment has to sit low on the chest so a lunge turns the dog's shoulders rather than lifting the whole harness. If the front ring rides up toward the throat, the harness is not doing anything a collar would not do.
Padding that stays put. Padding that shifts after a month is worse than no padding, because it bunches and rubs raw spots under the armpit.
What I ignore: color names, patch placement, and any harness sold in a single size. I also do not care how a harness photographs. Some of the best harnesses I have fitted look like something from a hardware store.
The two harnesses I start clients on
These are two different tools for two different dogs. One is a lighter walking harness built around chest control. The other is a heavy-duty vest for big dogs and rough terrain. Neither is right for every dog, and the fit instructions below matter more than which one you pick.
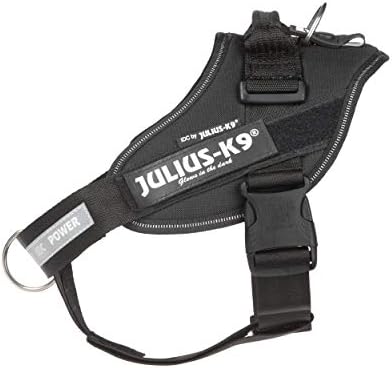
Front-clip pick: Julius-K9 IDC Powerharness, Dog Harness with Front Control Y-Belt, Size: 0, Black
 Visit on Amazon →
The IDC Powerharness is a training-community staple, and the reason is the front control Y-belt. Instead of one strap cutting straight across the chest, the Y splits the load across the breastbone, which is exactly where you want pressure on a dog that surges forward. That geometry is why I reach for this one first with a young, strong puller who has not yet learned anything about leash pressure.
The sizing is numeric, and this listing is size 0, so measure your dog's girth and chest before you order rather than guessing from the breed. The numbered sizing trips up more buyers than any other part of this harness, and a harness that is one size off will rotate no matter how carefully you adjust it.
Flaws but not dealbreakers: The front control belt has to be adjusted deliberately. Leave it too loose and it swings to one side of the chest, which kills the steering effect. Take five extra minutes with it. The straps also take a few walks to settle, so recheck the tension after the first outing.
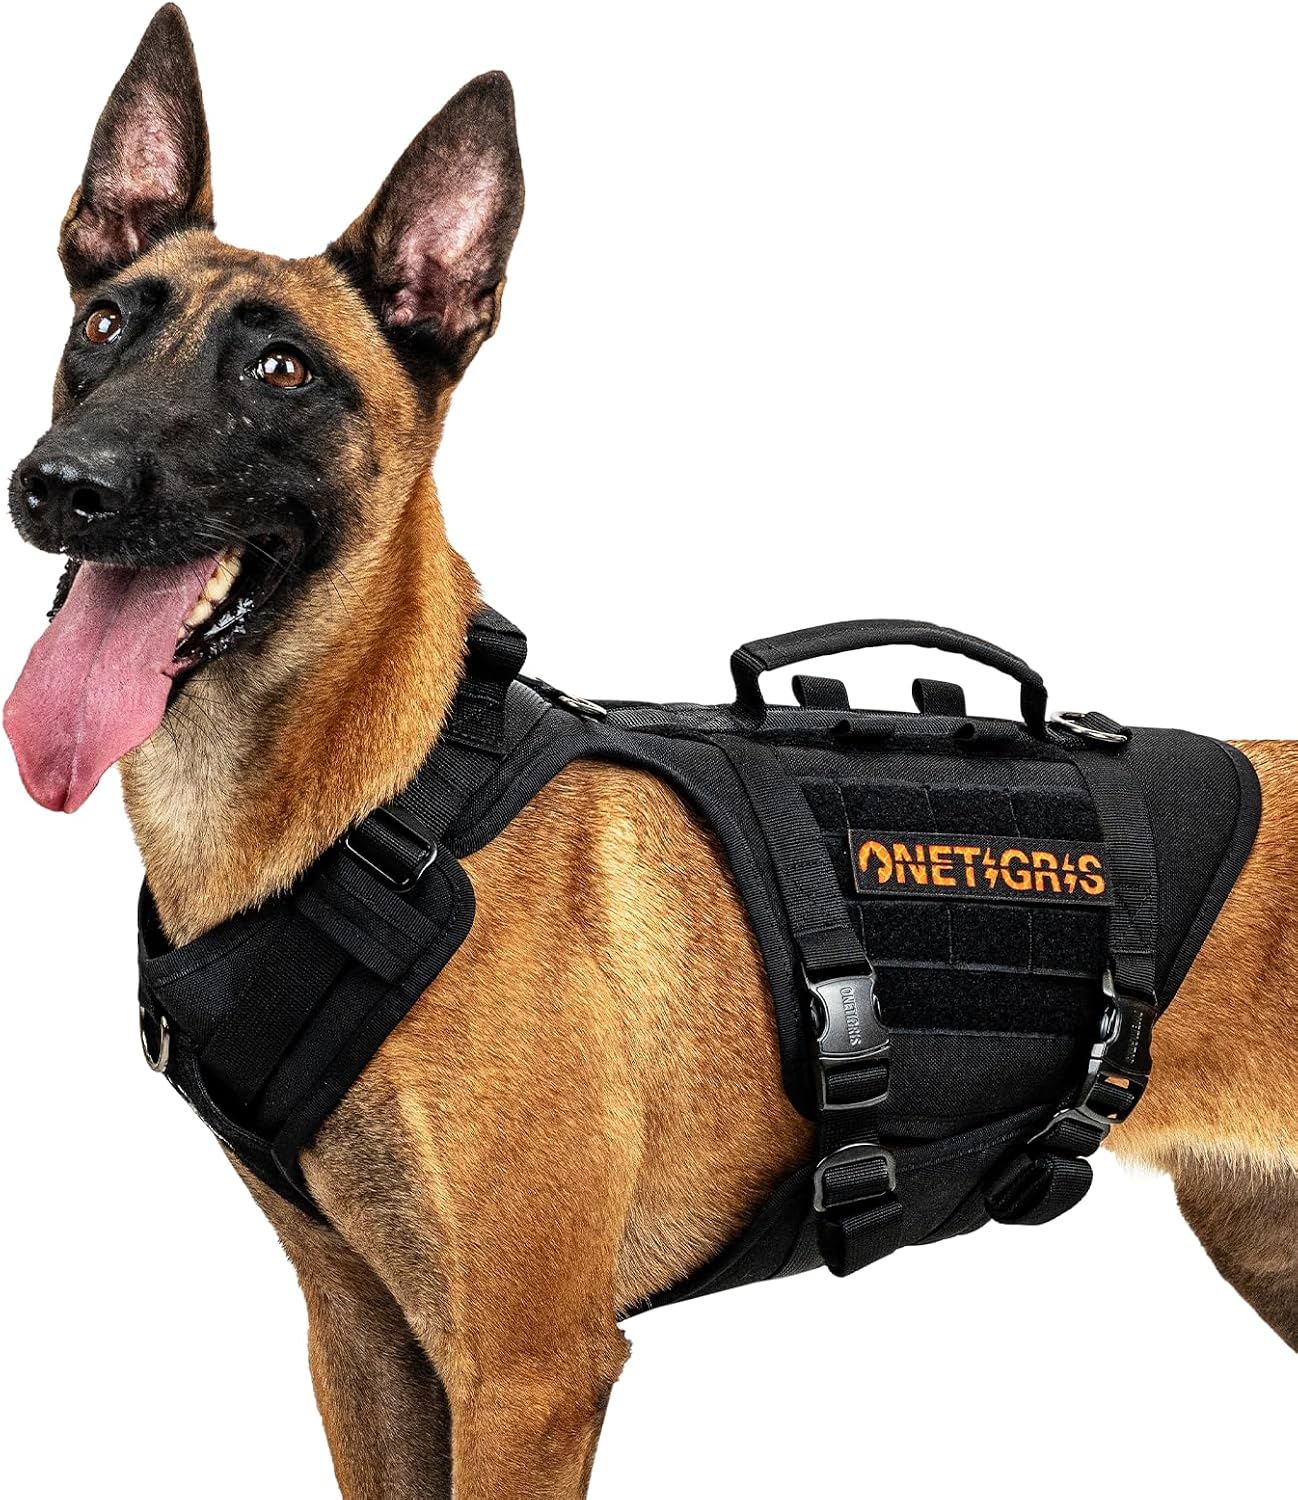
Heavy-duty pick: OneTigris Metal Buckles Durable Tactical Dog Harness for Large Dogs, No Pull Dog Vest Harness, Heavy Duty Dogs Harnesses with Handle, Large Hook and Loop Panels for Patch & Molle (Black, Large)
 Visit on Amazon →
This is the one I point people toward when the dog is genuinely large and the walking is genuinely rough. The metal buckles are the headline for me, because that is my single loudest complaint about cheap harnesses on big dogs. The built-in handle is the second reason, and anyone who has ever had to hold a lunging dog steady at a curb or lift a dog over a log understands why a top handle beats grabbing straps.
The large hook and loop panels take patches, and the MOLLE rows let you add a small pouch or a light for early winter walks. This listing is size Large, so if your dog sits near the top or bottom of that range, measure first.
Flaws but not dealbreakers: A vest-style harness covers more of the chest, which means more heat in summer and more fur trapped under the panels. Brush it out after wet walks and rinse it when the salt and mud build up. Black webbing also fades, which matters if you care how it looks after a Pacific Northwest winter. It does not matter to the dog.
The five fit points that decide everything
Every harness I fit gets checked at the same five places, in the same order. If one is off, the harness will pull, rub, or rotate.
One: the neck opening. This should be snug enough that the harness cannot slide down over the shoulders, but loose enough that you can slide two flat fingers underneath. If it is tight enough to press on the throat, size up or loosen it.
Two: the chest and shoulder strap. The Y or the chest strap should sit on the breastbone, across the front of the chest. It should not cross the throat, and it should not sit so low that it dips into the space between the front legs.
Three: the girth strap. This is the one that goes behind the front legs. It belongs just behind the ribcage, where the dog's body narrows. Put it on the widest part of the ribs and it will slide forward into the armpit the moment the dog pulls.
Four: armpit clearance. Slide a finger between the girth strap and the back of the front leg. There should be room, and the strap should not touch the leg when the dog stands. If it touches, the harness is either too far forward or too loose.
Five: the leash attachment. On a front clip, the ring should sit at the sternum, roughly where a necktie knot would land. On a back clip, the ring should sit between the shoulder blades, not up near the neck.
Step by step: fitting the harness
Step one: measure before you buy. Two numbers matter. The girth, taken around the widest part of the ribcage just behind the front legs, and the chest width, taken across the front of the chest between the shoulders. Write them down. Do not size up because a puppy might grow into it. A harness that is too big is a harness that rotates.
Step two: put it on loose. Loosen every strap before the harness goes on the dog. Trying to slide a tightened harness over a dog's head is how you teach a dog to hate the harness.
Step three: set the neck first. Adjust the neck strap to two fingers of slack. Everything downstream depends on this, because a loose neck lets the whole harness ride forward.
Step four: set the girth strap. Tighten it until it sits just behind the ribcage, then back it off until two fingers slide under. This is the strap that carries the load on a puller, so it should be the snuggest part of the harness without pinching.
Step five: check the chest strap. With the harness on and the leash clipped, pull gently forward and up. The chest strap should stay on the breastbone. If it slides toward the throat, the neck strap is too loose or the harness is too big.
Step six: check the armpits again. Dogs shift shape when they move. Have the dog stand, sit, and turn in a circle, then recheck the clearance behind the front legs.
Step seven: do a two-minute test walk. Walk the dog on a short leash, with slack, and watch the harness. You are looking for two things: rotation, where the whole harness slides to one side, and creep, where the girth strap walks forward into the armpit.
Step eight: reset after the first real walk. Harnesses settle. After 20 minutes of walking, and again after the dog shakes off, recheck every strap. Most of the harnesses I see in the field fail at this step, because nobody rechecks anything.
The two-finger rule, and how to run a check walk
The two-finger rule is not a suggestion, it is the whole test. Lay two flat fingers under a strap. They should slide in with a little resistance and not much more. One finger means too tight. Three fingers means the harness will rotate.
Run a proper check walk in a place with distractions, not in your hallway. Have the dog walk past another dog, a squirrel, or a parked delivery van, and watch the harness under real tension. Then stop and recheck the girth strap and the armpit clearance. A harness that passes in the living room and fails at the park was never fitted. It was just sitting still.
Mistakes that make a good harness fail
Sizing up for growth. A puppy will outgrow a correctly fitted harness in a few months anyway. Buying oversized means months of a harness that slides and rubs.
Leaving the girth strap loose. Owners loosen it because the dog seems uncomfortable. Usually the dog is uncomfortable because the strap is sitting on the ribs instead of behind them.
Clipping a puller to the back. A back clip on a 70-pound dog that pulls is a sled dog setup. Use the front attachment for training and save the back attachment for a settled dog or a long line in an open field.
Expecting the harness to do the training. A front clip makes pulling awkward for the dog. It does not teach your dog what you want instead. Pair it with reward-based loose leash work, or you will own a very well-equipped pulling dog.
Never washing it. Salt, mud, and shed fur pack into the padding and the webbing. Rinse the harness by hand, air dry it, and brush the dog's coat where the panels sit.
What this costs, and how long it lasts
Both harnesses here sit in the mid range for a walking harness, and you can check the current Amazon price on each with the links above. Do the math per day rather than per purchase. A harness that lasts three years of daily walks costs you pennies a day, and it costs you nothing at all compared to a veterinary bill for a neck injury or a shoulder that never quite moves right again.
The honest version of my recommendation is that most dogs need more than one harness. A walking harness for training and a separate, properly rated setup for the car, because a harness that steers a puller is not the same product as a harness that holds a dog in a crash. The industry pretends one harness does both. It does not.
When the harness is not the answer
A harness reduces pressure on the neck and gives you leverage. That is all it does. If your dog lunges at other dogs, barks at cyclists, or drags you toward every doorway on the block, the harness is one tool in a longer plan that includes rewarding the behavior you want and managing the distance to the things that set your dog off.
Fit it correctly first, because a badly fitted harness makes even a good training plan feel like it is failing. Then do the training. That order matters, and it is the reason so many people give up on a harness that was never the problem in the first place.