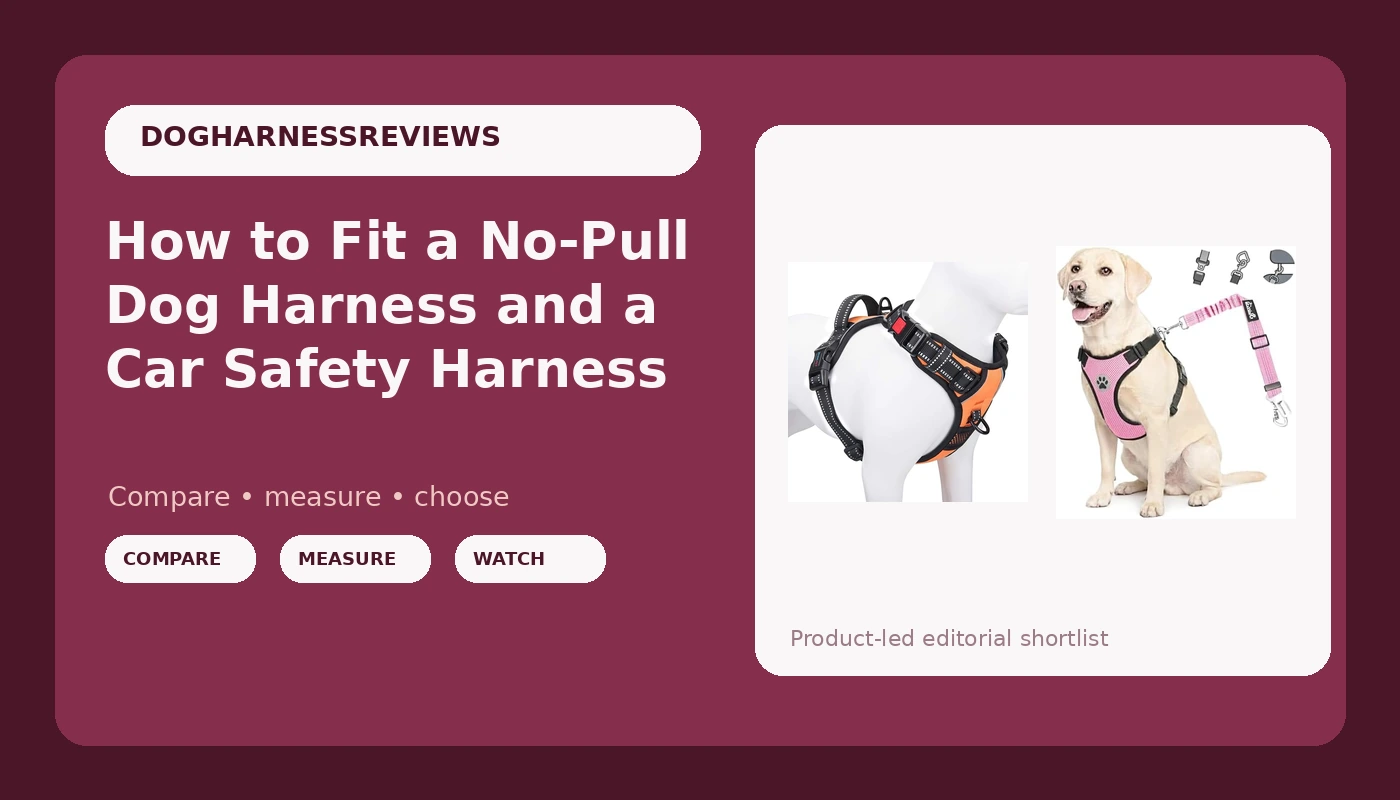
Most people who tell me their dog pulls are describing a fitting problem, not a training problem. I have fitted harnesses on more than 3,000 dogs, first at a shelter where I spent eight years with reactive and pulling dogs, and now in my own training business in Portland, Oregon. The failure I see over and over is the same: a proper no-pull dog harness fit was never achieved, the front clip sits somewhere near the dog's armpit, and the owner has already decided the product is junk. A harness is a training tool, not a fashion accessory. If it does not stop pulling, it is a fancy collar.
The good news is that fit is 80% of the outcome. The best harness in the world fails on a dog it does not fit, and a $25 harness adjusted correctly will outwork a $90 harness that slides around. This guide covers the fit points I check on every dog, the six-step adjustment routine I walk clients through, and the second harness most people forget they need, the one that keeps a dog from becoming a projectile in a crash.
Why you should trust me
I am a certified dog trainer. Before I ran my own business, I spent eight years at a shelter working almost exclusively with reactive and pulling dogs. Fitting harnesses was part of the job, and I stopped counting at 3,000 dogs. I keep a shelf of more than 30 harnesses that I have worn down to nothing: washed repeatedly, yanked on, and handed to my own two German shepherds for long stretches on Portland sidewalks.
I measure the things that fail. Strap webbing width, buckle metal versus plastic, how long the padding stays where it was sewn. I have bent three plastic D-rings with my thumb, which is why my rule is simple: front clips should be metal, and anything over 40 pounds should not touch a plastic buckle. I do not review prong or shock collars. Different philosophy, different guide.
What fit actually means on a dog
Fit is not "snug." Fit is five specific points landing in five specific places, and if any one of them is off, the harness either rubs or stops working.
The girth strap. This is the strap that wraps behind the front legs, around the deepest part of the ribcage. It should sit two to three inches behind the front legs, not tucked into the armpit. An armpit strap rubs a raw spot in about a week.
The chest strap. It crosses the front of the dog, and it should land across the sternum, not across the throat. If you can slide it up so it touches the windpipe, the harness is too big or adjusted wrong.
The front clip. On a no-pull harness, this is the load-bearing point. It should sit at the center of the chest, below the throat and above where the chest strap crosses. If it drifts to the side, the leash pulls the harness sideways and the dog just leans into it.
The back plate and back ring. The back attachment point should rest between the shoulder blades, not on top of the neck and not halfway down the spine. A back plate that sits too far forward drags the whole harness out of position.
The shoulder clearance. The dog should be able to extend the front leg fully without the harness catching the shoulder. Watch a front leg reach forward. If the strap rides up into the armpit on the reach, it is too far forward.
One check covers most of this. Slide two fingers flat under every strap. If you can fit two fingers but not three, that is right. If the strap is loose enough to rotate a quarter turn, it is too loose.
How to fit a no-pull harness in six steps
Step one: measure before you buy. Two numbers matter. The girth, measured around the deepest part of the ribcage right behind the front legs, and the chest, measured around the widest part of the chest behind the front legs. Write both down. Do not guess from the breed. A dog that looks like a medium in photos can measure small at the ribcage and large at the chest.
Step two: loosen everything first. Out of the box, every strap is usually somewhere in the middle. Before the harness goes on the dog, loosen all four adjustment points so you have slack to work with. Trying to adjust a harness that is already tight on the dog is how people end up with a wrestling match and a bad fit.
Step three: put it on with the dog standing. A step-in harness goes on one leg at a time. An over-the-head harness slides over the head and then you fasten the side buckles. Either way, the dog stands. A dog that is sitting or lying down compresses the ribcage and every measurement you take is wrong.
Step four: girth first, then chest, then shoulders. Tighten the girth strap to the two-finger rule. Then the chest strap. Then the shoulder straps, which are the ones that keep the front clip centered. This order matters. If you tighten the shoulders first, you will pull the girth strap out of position when you finally get to it.
Step five: run the reach test. With the harness adjusted, hold a treat at chest height and let the dog reach for it. Watch both front legs. The straps should stay clear of the armpit through the full reach. If they dig in, loosen the girth one notch and re-center the chest strap.
Step six: walk ten minutes, then check for rub. A harness that fits can still rub if the padding shifts. Walk the dog, then run your fingers under the girth strap and around the armpit. Red skin, flattened fur, or a dog that stops to scratch means the harness moved. Fix it before the second walk, not after the sore shows up.
Two caveats worth repeating. If the front clip rotates to either side while your dog walks, the harness is too loose at the chest. If the chest strap rides up and touches the throat, the harness is too small, not too big. Sizing up is the fix there, not adjusting.
The two harnesses I would start with
You need two harnesses, and the industry pretends one does both jobs. A walking harness is built to redirect pulling force. A car harness is built to hold a body in a crash. They are not interchangeable, and using one for the other job is where the risk lives.
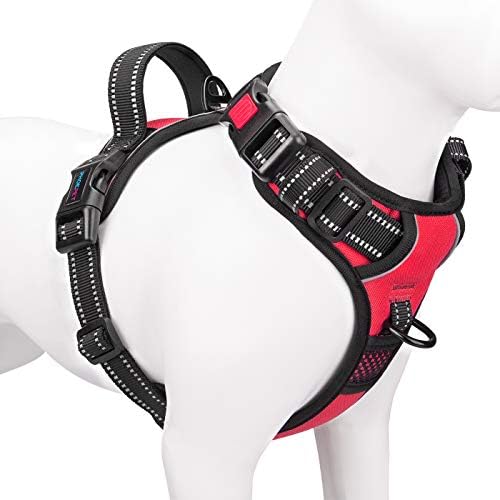
Walking harness: PHOEPET No Pull Dog Harnesses for Small Dogs Reflective Adjustable
 Visit on Amazon →
This is the harness I hand to clients with small pullers who want a front clip without paying premium-brand money. The reflective stitching is the detail that matters in Portland from October through April, when it is dark at 4:30 in the afternoon and every walk happens under streetlights. It is adjustable at multiple points, which is the non-negotiable for a small dog, because small dogs vary wildly at the chest and a single-size harness will either gap at the ribs or squeeze the shoulders.
Fit notes for this one. Small dogs have less room between the throat and the sternum, so the chest strap needs to land low. Set the girth strap first, then pull the chest strap down until it crosses the flat of the chest. If you have a dog under 15 pounds, expect to tuck or trim excess strap so it does not flap. Watch the armpit area on the first three walks, because that is where small harnesses rub first.
Flaws but not dealbreakers: Small-dog harnesses in this price band tend to use lighter hardware. Check the buckles once a month and retire the harness if you see cracking. If your dog is over 25 pounds, buy a harness rated for that weight instead of stretching this one.
Anyone with a small dog that leans into the leash and slips a collar should start here.
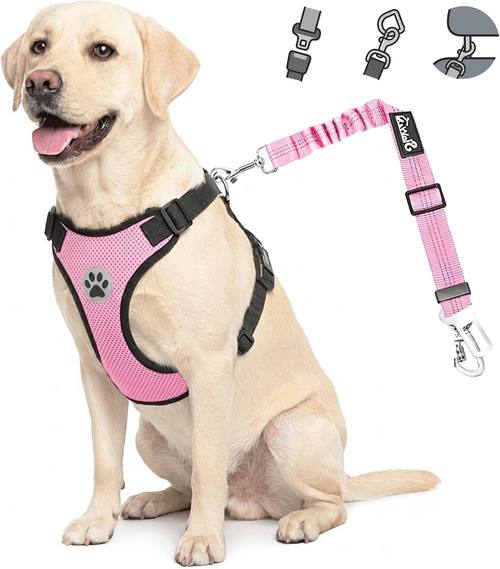
Car harness: Lukovee Dog Car Harness Seat Belt, Harness & Seatbelt with 2 in 1 Buckle
 Visit on Amazon →
The car harness is the piece most owners skip, and it is the one I push hardest. A dog loose in a car is a 40-pound object traveling at highway speed, and in a hard stop it goes wherever physics says. This one pairs a harness with a seat belt attachment and a 2 in 1 buckle, so the same strap point that clips to a leash can clip into the seat belt.
The fitting rules are different from a walking harness. A car harness sits closer to the body, because it is not redirecting pull, it is spreading crash load across the chest and ribcage. Set it snug, tighter than you would for a walk, then check that the dog can still sit, stand, and lie down without the straps binding. The dog should be able to change position. A harness that pins a dog upright for a four-hour drive is a bad harness.
Two things to get right in the car. Run the seat belt through the loop as directed rather than clipping the dog to a cargo hook, and keep the dog in the back seat. A dog in the front seat behind an airbag is in the worst possible spot in the vehicle.
Flaws but not dealbreakers: This is a crash-mitigation product, not a certified crash-tested restraint. If you drive long highway distances with a large dog, look for a harness that publishes crash test results. For errands and vet runs with a small or medium dog, this does the job at a price that does not make people hesitate.
The fit mistakes I see every week
Buying one harness for two jobs. A walking harness in a crash has stretch and give in exactly the wrong places. A car harness on a walk has no front clip, so a puller just drags you faster.
Adjusting while the dog sits. Sit a dog down and the ribcage compresses. Every strap you tighten is then wrong the moment the dog stands up.
Leaving the front clip under the armpit. This is the single most common error I see. The leash then pulls sideways and the dog gets zero steering feedback. The clip belongs at the center of the chest.
Trusting padding that shifts. Padding that slides out of position after a month is worse than no padding at all, because it bunches and rubs. Check where the padding sits after every wash.
Ignoring the buckle. Plastic buckles have their place on tiny dogs and light loads. On a 50-pound dog that lunges, they do not. Buckle quality is the entire product, and I have watched a plastic buckle come apart on a single leash pop.
Sizing by breed instead of by tape measure. I do not give breed-specific sizing advice, because two dogs of the same breed can differ by four inches at the chest. Measure the dog in front of you.
What this all costs
Two harnesses, and the math is boring in the best way. A walking harness in this range and a car harness in this range together cost less than one premium harness with a better website, and they cover both jobs properly. Over two years of daily walks, that is a few cents a day.
What you are actually buying with a correct fit is different. A harness that lands on the five fit points takes pressure off the throat, gives you steering control through the front clip, and lets you work on the pulling instead of fighting the gear. A harness that does not fit does none of that. It rubs, it rotates, and it teaches your dog that the leash is just noise.
Do the six steps once, write the measurements down somewhere you will find them, and re-check the fit every couple of months. Puppies change shape fast. Adult dogs change with coat and weight. Fit is not a one-time event, it is maintenance.
That is the whole job. Five minutes with a tape measure and a dog standing still is the difference between a harness that works and a harness that ends up in a drawer.