Most no-pull dog harnesses fail for one reason, and it is not the hardware. It is the no-pull dog harness fit. Owners cinch the girth strap until the buckle creaks, leave the chest strap loose, and then wonder why the front clip slides under the dog's armpit and the whole thing rotates sideways the moment the dog leans. The harness is not broken. It is on wrong.
I am a certified dog trainer in Portland, Oregon. I spent eight years at a shelter working with reactive and hard-pulling dogs, and I now run my own training business, where a big chunk of my day is fitting harnesses and then watching owners walk out the door with them. I keep a shelf of harnesses I have washed, yanked on, and handed to clients with German shepherds and pit mixes who pull like freight. The lesson that repeats every single week is this: fit is most of the outcome. A cheap harness that sits on the right fit points beats an expensive one that rides an inch too low.
This guide covers both halves of the job. First, how to fit a front-clip no-pull harness so the clip actually does its work. Second, how to add a rear lift harness when your large dog needs help getting up the stairs, into the car, or through the last two years of a long life. They are different tools for different jobs, and most owners who need the second one buy the first one twice.
Why you should trust me
I have fitted harnesses on well over 3,000 dogs, most of them at the shelter where a bad fit meant a dog went back to the kennel with a rubbed armpit. I measure strap webbing, check whether the D-rings are metal or plastic, and watch how padding behaves after a month of Pacific Northwest rain and mud. I do not review prong or shock collars, because I do not use them, and I do not pretend a harness replaces training. It does not. It buys you control while the training happens.
How I picked and how I tested
The two harnesses below are not a ranking of every harness on the market. They are the two I reach for when a client has a specific problem, one that pulls, one that needs physical support.
When I evaluate a walking harness, I look at four things. First, strap webbing: how wide the chest and girth straps are, and whether they hold their shape or roll into a rope under load. Second, hardware: metal D-rings and metal or heavy composite buckles, because I have bent plastic D-rings with my thumb and watched plastic buckles give out on a leash pop. Third, clip placement: a front clip has to sit below the throat and above the breastbone, where forward motion gets redirected sideways instead of pulling the dog off balance. Fourth, padding behavior: padding that shifts after a month of washing is worse than no padding, because it bunches and rubs raw spots under the front legs.
For a rear lift harness, the criteria change completely. I look at how much of the belly the wrap covers, whether the lift handle sits over the hips or behind them, and whether the straps clear the dog's urine stream so the harness does not need a wash every day.
I am not going to hand you invented test numbers. What I can tell you is what I check, what I see fail, and what I recommend to a normal owner with a normal puller.
The two harnesses worth putting on a pulling or struggling dog
These solve different problems. Read the headings, not the prices, and match the tool to your dog.
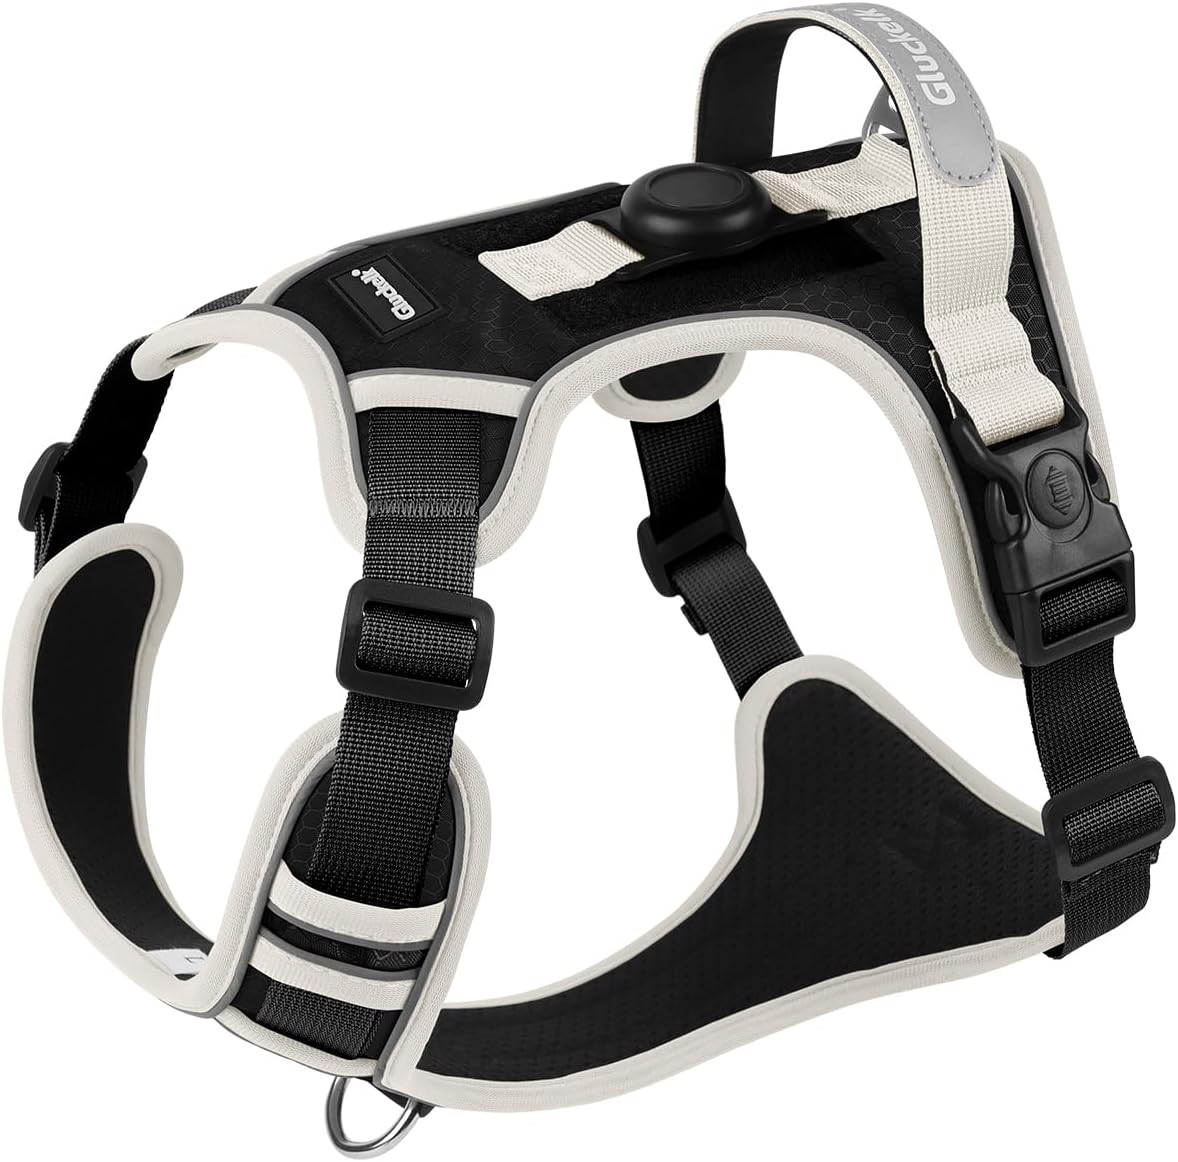
Best for pullers: No-Pull Reflective Padded Dog Harness
 Visit on Amazon →
This is a front-clip walking harness with a padded chest panel and reflective trim, and it is the one I put on a dog that drags its owner down the block. The front attachment point is the whole reason it works. When the dog surges forward, the leash tension pulls the chest sideways instead of forward, which turns the dog back toward you. That is the mechanics of every no-pull harness worth owning, and this one gets the clip in roughly the right spot without you having to fight the design.
The reflective piping matters more than people think in a city like Portland, where it is dark by 4:30 in December and every walk happens under streetlights or headlights. The padding on the chest plate is what keeps the straps from digging in when the dog hits the end of the leash, and the multiple adjustment points mean you can actually balance the harness on a deep-chested dog instead of choosing between too loose at the neck and too tight at the ribs.
Check current Amazon price on the listing, and size by girth measurement, not by weight. Weight charts are guesswork. A soft tape around the widest part of the ribcage, just behind the front legs, is the number that matters.
Flaws but not dealbreakers: Reflective trim fades with hard washing, and the padding needs to be checked after a few months to make sure it has not migrated. Neither is a reason to skip it.
Anyone with a dog that pulls on a flat collar or a back-clip harness will feel the difference on the first walk.
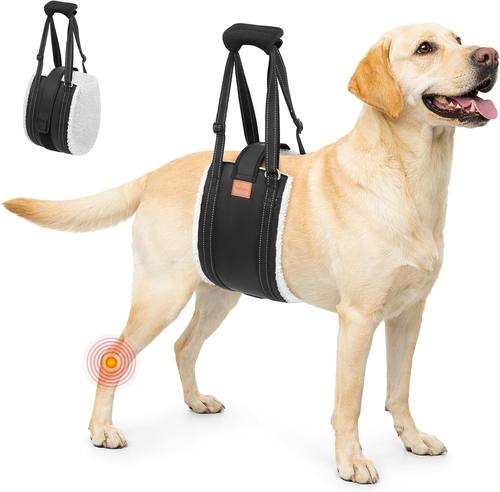
Best for senior dogs: LOOBANI Dog Lift Harness Rear Leg Support for Large Dogs Secure Belly Wrap
 Visit on Amazon →
This is not a walking harness, and anyone who buys it expecting one will be disappointed. It is a rear support sling with a belly wrap and a lift handle, built for large dogs whose hind legs are not doing what they used to. Arthritis, post-surgery recovery, degenerative myelopathy, the last stretch of a senior dog's life: this is the tool that keeps a big dog off the floor and out of your arms.
The belly wrap spreads the lift across the abdomen instead of concentrating it in one strap, which is the difference between helping a dog up and hurting one. The handle sits over the hips, so when you lift, you are supporting the back half of the dog rather than hoisting from the middle. For a dog that can still walk but cannot manage stairs, a car ramp, or a slick hardwood floor, this is the difference between three walks a day and one.
Check current Amazon price. Measure the belly circumference and the distance from the front legs to the hips before you order, because a wrap that is too short will ride forward into the ribcage.
Flaws but not dealbreakers: It is not designed for all-day wear, and it needs to come off for bathroom breaks unless you have checked the clearance around the rear. Use it for the moments that need it.
Owners of large senior dogs, or anyone rehabbing a dog after hind-leg surgery, are the right buyers here.
How to fit a no-pull harness in seven steps
This works on the No-Pull Reflective Padded Dog Harness and on any front-clip harness built the same way.
Step one: measure girth first. Soft tape around the widest part of the ribcage, right behind the front legs. Write the number down. Then measure the neck. Order to the girth number and adjust the neck down from there.
Step two: loosen everything before it goes on. Every strap on a new harness is set to a middle position that fits almost no dog. Loosen the neck, chest, and girth straps all the way out, slide the harness over the head, then start tightening.
Step three: center the chest plate. The padded panel belongs on the breastbone, straight down the middle of the chest. If it is off to one side, the dog will drift sideways on the leash all walk long.
Step four: tighten the chest strap before the girth strap. This is the step almost everyone reverses. The chest strap controls rotation. Snug it so the harness cannot slide back and forth over the shoulders, then bring the girth strap in until you can slide two fingers under it, not a whole hand.
Step five: check the front clip. It should sit at the top of the breastbone, below the throat. If it rides up near the neck, the harness is too loose at the chest. If it sits down between the front legs, the harness is too long for your dog's body and no amount of adjustment will fix it.
Step six: do the shoulder check. Slide your fingers under the strap where it crosses the shoulder joint. It should clear the point of the shoulder and move with the leg, not over it. Strap over the shoulder joint is what causes the chafing owners blame on the product.
Step seven: walk a figure eight and re-check. Put the leash on the front clip and walk a slow figure eight for two minutes. A correct fit holds its position. A wrong fit rotates toward the side the dog pulls on. Fix it before you go home, then re-check the girth after ten minutes of walking, because most dogs blow out a breath and the strap finds a new resting place.
How to fit a rear lift harness without hurting your back
Step one: measure the belly and the length. Belly circumference at the widest point, plus the distance from behind the front legs to the base of the tail. A wrap that is too long will push into the ribcage when you lift.
Step two: wrap under, not over. The belly wrap goes under the abdomen, with the handle over the hips. Lift with a flat back and bent knees, using both hands on the handle when you can.
Step three: lift straight up, not forward. The goal is to take weight off the hind legs, not to drag the dog toward you. Let the dog do the walking.
Step four: build a routine. Use it for the stairs, the car, and the slick floors. Take it off for resting and for bathroom breaks unless you have verified the clearance.
Fit mistakes that cause rubbing and rotation
The number one mistake is tightening the girth strap to fix a chest strap problem. If the harness rotates, the chest strap is loose, not the girth strap. The second mistake is sizing by weight. A dog's weight tells you nothing about where the clip lands. The third is leaving a wet harness on. Wet webbing stretches, dries tight, and rubs. The fourth is buying one harness for everything. A front-clip walking harness is not a car restraint and not a lift sling, no matter what the listing photos suggest.
And the honest caveat: a no-pull harness reduces the force your dog puts on its own throat. It does not teach your dog not to pull. If you skip the training, you will be managing the pull for the rest of the dog's life.
What I skipped and why
Back-clip harnesses are fine for dogs that already walk politely. On a seventy-pound dog that pulls, a back clip is a sled dog setup, and I will not recommend one for that job. Prong and shock collars are a different philosophy and I do not review them. Car restraints are their own category with their own crash-testing questions, and a walking harness should not be asked to do that job. The two harnesses here cover the two jobs most owners actually have: a dog that pulls, and a dog that needs help.
What this all costs
Both of these sit in the modest end of the harness market, which is exactly where I send clients. The walking harness and the lift harness together cost less than one premium Instagram-brand harness, and they do two jobs instead of one badly. Check current Amazon price on each listing for today's number.
The math that matters is not the sticker. It is the vet bill for a neck injury, the cost of a shoulder that gets rubbed raw by a bad fit, and the days you cannot get your senior dog outside. Fit the front clip correctly, add the lift wrap when your dog's back end starts to go, and re-check both every few months as your dog's coat and body change.
That is the whole job. Measure, adjust, walk, and adjust again.