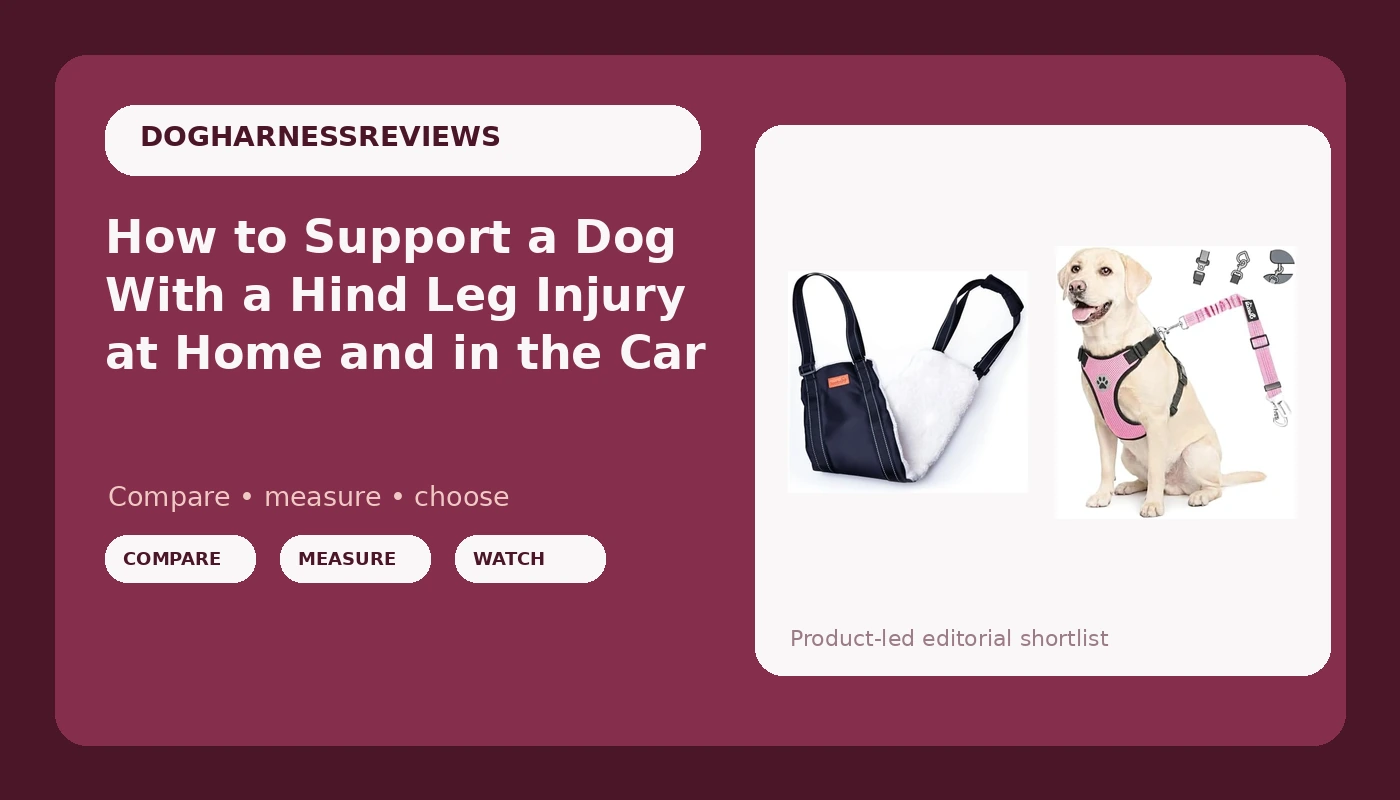
A torn cruciate ligament, a bad landing off the couch, a senior dog whose back end quits on the stairs: whatever put your dog's hind legs out of commission, the next six weeks are a logistics problem as much as a medical one. Your dog still has to pee, still has to get to the vet, and still has to be moved off a slippery floor without you wrecking your own back or your dog overloading the good leg.
Good dog hind leg support is not one product. It is a routine: the right sling, the right fit, the right sequence on stairs, and a restraint that keeps a wobbly dog from becoming a projectile on the drive to the clinic.
I fit gear for a living and I have walked a lot of dogs through recovery. This is exactly how I set my clients up, in order, with the two pieces I hand them first.
Why you should trust me
I'm Tomás. I run a training business in Portland, Oregon, and before that I spent eight years at a shelter working with reactive and pulling dogs. I have fitted harnesses on more than 3,000 dogs, and I keep a shelf of 30-plus harnesses I have tested to destruction: washed a hundred times, yanked on, and worn by my own two German shepherds.
A big share of my current clients are dogs in recovery. TPLO surgery, tightrope repairs, or a conservative-management plan where surgery is off the table because of age or cost. The rear sling and the car restraint are the two pieces of gear that decide whether those six weeks go smoothly or turn into a wrestling match on the front steps. I care about fit, buckle quality, and whether the thing still works after a Pacific Northwest winter. That is the lens here.
The two jobs, and why one product cannot do both
There are two separate jobs in a hind-leg recovery, and they need two separate pieces of gear.
Job one is unloading weight while the dog is upright. That means a support sling: a wide strap that runs under the belly and lets you take 20 to 40 percent of the load while your dog walks. It is not a carrier. You are not lifting a shepherd up a staircase with one hand, and anyone who tells you otherwise has never tried it.
Job two is keeping the dog contained in a moving vehicle. That means a car harness with a tether that clicks into the seatbelt receiver. A walking harness does not do this. A back-clip harness on a big dog in the back seat is a dog launched into the back of your head at 30 miles an hour. I have written about this split before, because the industry keeps pretending one harness handles both. It doesn't.
Get both pieces. They are not expensive, and they solve different problems.
The gear you need before the first step
You want both items in the house before the dog comes home, not ordered the night after surgery. Fitting a sling on a dog who is already panicking on the front step is a bad time for everyone.
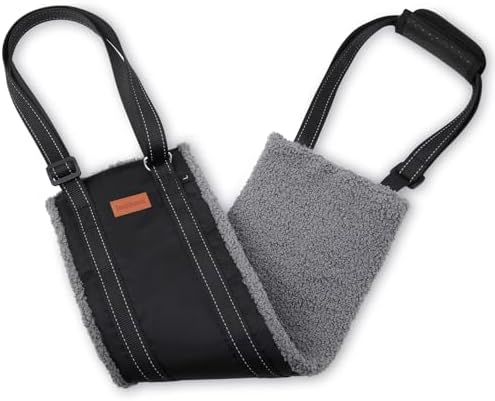
Hind-end support: LOOBANI Adjustable Dog Sling for Large Dogs Hind Leg Support ACL Recovery
 Visit on Amazon →
This is the piece I hand clients first, and it is the one they keep using after the stitches come out. It is built as a belly strap with a handle, sized for large dogs, and the adjustable length is the whole point: you set it so the handle lands at your hip, which means you walk upright instead of hunched over your dog like you're bailing out a canoe.
Use it for stairs, hardwood, tile, the vet's linoleum, and every potty break. The handle gives you a place to grab that isn't the dog's leg or your dog's skin. The strap runs under the belly, in front of the hind legs and behind the ribs, which is the spot a dog will tolerate without fighting you.
Flaws but not dealbreakers: This is a support strap, not a lift. If your dog is 90 pounds and cannot stand at all, you need two people and a proper sling with two handles, not this. And like any strap that sits against the belly, it needs to come off between uses. Leaving it on all day traps fur and rubs.
Anyone with a large dog who can still stand but needs help staying steady will get their money's worth out of this in the first week.
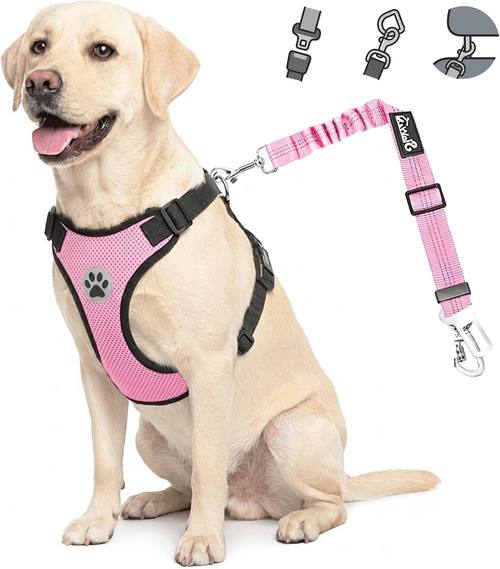
Car restraint: Lukovee Dog Car Harness Seat Belt, Harness & Seatbelt with 2 in 1 Buckle
 Visit on Amazon →
This is the car piece. It is a harness plus a seatbelt tether with a two-in-one buckle, so the tether clicks into your car's seatbelt receiver and clips to the harness. That is the correct configuration. A tether that loops around a headrest or hooks to a cargo ring is not.
The point of a car restraint is not comfort, it is physics. A dog loose in the back seat becomes a missile in a hard stop, and a dog in recovery becomes a missile that lands on the leg you just paid to repair. Buckled in, your dog can sit, stand, turn around, and lie down, and cannot climb into your lap while you are merging.
Flaws but not dealbreakers: No harness in this price range is a guarantee. This keeps your dog in place and out of your lap. It is not a crash-tested capsule, and I won't pretend otherwise. Also, the tether is only as good as your seatbelt receiver, so test the click before you trust it.
Anyone who drives a recovering dog to rechecks, or who just wants their dog out of the front seat for good, should own one of these.
How to fit and use the sling, step by step
Step one: Get the rules from your vet in plain words. Ask what weight-bearing status your dog is on: full, partial, toe-touch only, or none. That answer changes everything below. If your dog is non-weight-bearing, the sling is for balance and the walk is a carry with a second person.
Step two: Fit the sling standing still. Strap under the belly, forward of the hind legs, behind the ribs. Adjust the length so the handle sits at your hip. If you have to bend at the waist to reach it, the strap is too long and your back will hate you by day three.
Step three: Practice on carpet before you touch stairs. Two minutes on a flat, non-slip floor. Keep the strap taut, not tight, and let your dog set the pace. Watch the ears and the tail. If your dog freezes or tries to sit, the strap is probably too far forward and digging into the ribs.
Step four: Stairs, one step at a time. Going up, stay beside your dog with the sling hand low and steady. Going down, keep the strap tight so the hind feet cannot slide out from under. Pause at the landing. If your dog is on strict rest, you carry, and stairs are for emergencies only.
Step five: Potty breaks on a short leash. Sling on, five minutes, no wandering, no sniffing tour of the block. The sling is what lets you get back inside without a slip.
Step six: Check the belly every single day. Look for redness, chafing, and matted fur. Wash the sling when it gets soiled. Padding that shifts and rubs is worse than no padding, and a strap that lives against the belly needs to be clean.
Step seven: Wean off gradually. As strength comes back, use the sling only for stairs and slick floors. Keep it by the door for another month after your dog looks normal. Dogs hide a weak leg until they don't.
How to set up the car ride, step by step
Step one: Harness on inside the house, before the door opens. Do it in the hallway while your dog is calm. Fitting a car harness in a parking lot with a dog on three legs is a two-person job you don't want.
Step two: Buckle the tether, then clip the harness. Click the tether into the seatbelt receiver first, then attach it to the harness. Adjust the length so your dog can sit and lie down but cannot reach the front seat.
Step three: Back seat only. Never the front seat. An airbag deploying into a dog is not a safety feature.
Step four: Keep the sling in the car. The unload is the risky part. Sling on before the door opens, then a slow step down to the pavement.
Step five: Vet parking lots are slippery. Every clinic I have been to has polished floors. The sling stays on from the car to the exam room, and the harness stays on for the ride home.
Where people go wrong
Using a walking harness as a car restraint. I see this weekly. A back-clip walking harness has no tether and no seatbelt path. It does nothing in a crash.
Putting the sling under the ribs. Too far forward and the dog fights it, plants its feet, and refuses to move. The strap belongs under the belly, ahead of the hind legs.
Lifting the whole dog with the sling. It is a support strap. Hoisting a 75-pound dog by one handle puts all the load on the strap edge and on your wrist. Two people for real lifting.
Plastic buckles on a big dog. Buckle quality is the entire product. I have seen a plastic buckle explode on a leash pop, and I will not put one on a dog over 40 pounds. Metal hardware on anything load-bearing.
Leaving the sling on all day. It traps fur and mats it. On for the walk, off for the nap.
Declaring victory early. Your dog will look better before the leg is ready. Keep the sling by the door for the full recovery window your vet gave you, and keep the stairs boring.
What this costs, and what you can skip
I don't quote prices on gear, because they move and I would rather you look them up yourself: check the current price on both items before you order, and check the sizing chart for the sling against your dog's actual weight, not the weight you wish your dog was.
Both pieces sit in the budget tier of recovery gear, and both outlive the injury. The sling becomes a senior-dog tool for slick floors and the car ramp years. The car harness stays in the car forever, because a restrained dog is the correct way to travel whether or not anyone is recovering from anything.
What you can skip: the specialty recovery beds and the wheeled carts. Those have their place, but they are not what gets your dog through the first three weeks. A sling, a car harness, a few non-slip rugs, and a vet who tells you the weight-bearing rules in plain language will do more than any of it.
The routine is the product. Sling on for the stairs, harness on for the drive, check the belly, keep the floors boring, and let your dog tell you when the leg is ready. Six weeks from now you will both be walking normally again, and the gear will still be earning its keep.
That's the job. Your dog does the healing. Your job is making the healing possible.