Most owners buy a no-pull dog harness, put it on in the driveway, and never touch a strap again. Then the dog still pulls, the front leg rubs raw, or the whole thing spins sideways on a hard stop, and the product gets blamed for a fit problem. A no-pull dog harness fit is 80 percent of the outcome, and it takes about ten minutes.
I have fitted harnesses on more than 3,000 dogs, most of them at a shelter where the dogs had never worn one and the owners had never adjusted one. The pattern is always the same: the harness is roughly the right size, and it is set up completely wrong. The neck opening is too loose, the chest strap sits in the armpit, and the leash clip rides at the throat instead of the sternum.
This is the process I walk clients through in Portland, Oregon, on the sidewalk outside my training room, usually while a dog lunges at a passing skateboard and we keep working anyway.
Why you should trust me
I spent eight years at a shelter working with reactive and pulling dogs before I opened my own training business. I have fitted harnesses on everything from a nine-pound pug to a hundred-pound shepherd mix, and I have watched a lot of owners spend good money on gear that failed for reasons that had nothing to do with the gear.
I keep a shelf of more than 30 harnesses that I have taken to destruction: washed repeatedly, yanked on, dragged across pavement, and worn by my own two German shepherds. I look at three things first on any harness. Buckle material. Strap webbing. Whether the padding stays sewn where it started after the fifth wash.
I do not care what a harness looks like on the shelf. A harness is a training tool, not a fashion accessory. If it does not change the pulling, it is a collar with extra steps.
How I picked and how I tested
The two harnesses below are not the whole market. They are the two I reach for most often when an owner needs something that works this week, and they cover two very different body types.
When I evaluate a harness, I run the same checks every time. I flex the D-ring with my thumb, because a front clip should be metal and I have bent three plastic ones by hand. I roll the webbing between my fingers to feel whether it is flat-woven or loose. I check where the padding is anchored, because padding that shifts after a month is worse than no padding at all, since it rubs raw spots on a moving dog. Then I put it on a dog with a broad chest and a dog with a narrow one and see which fit points the design actually adjusts.
What I will not do is guess your dog's size from a photo. Measure the girth and buy to that number.
The two harnesses I would start with
One is a step-in design for smaller dogs and the other is built around a broad chest. Both are in the range where I actually find winners, and neither asks you to trust a brand name over a buckle.
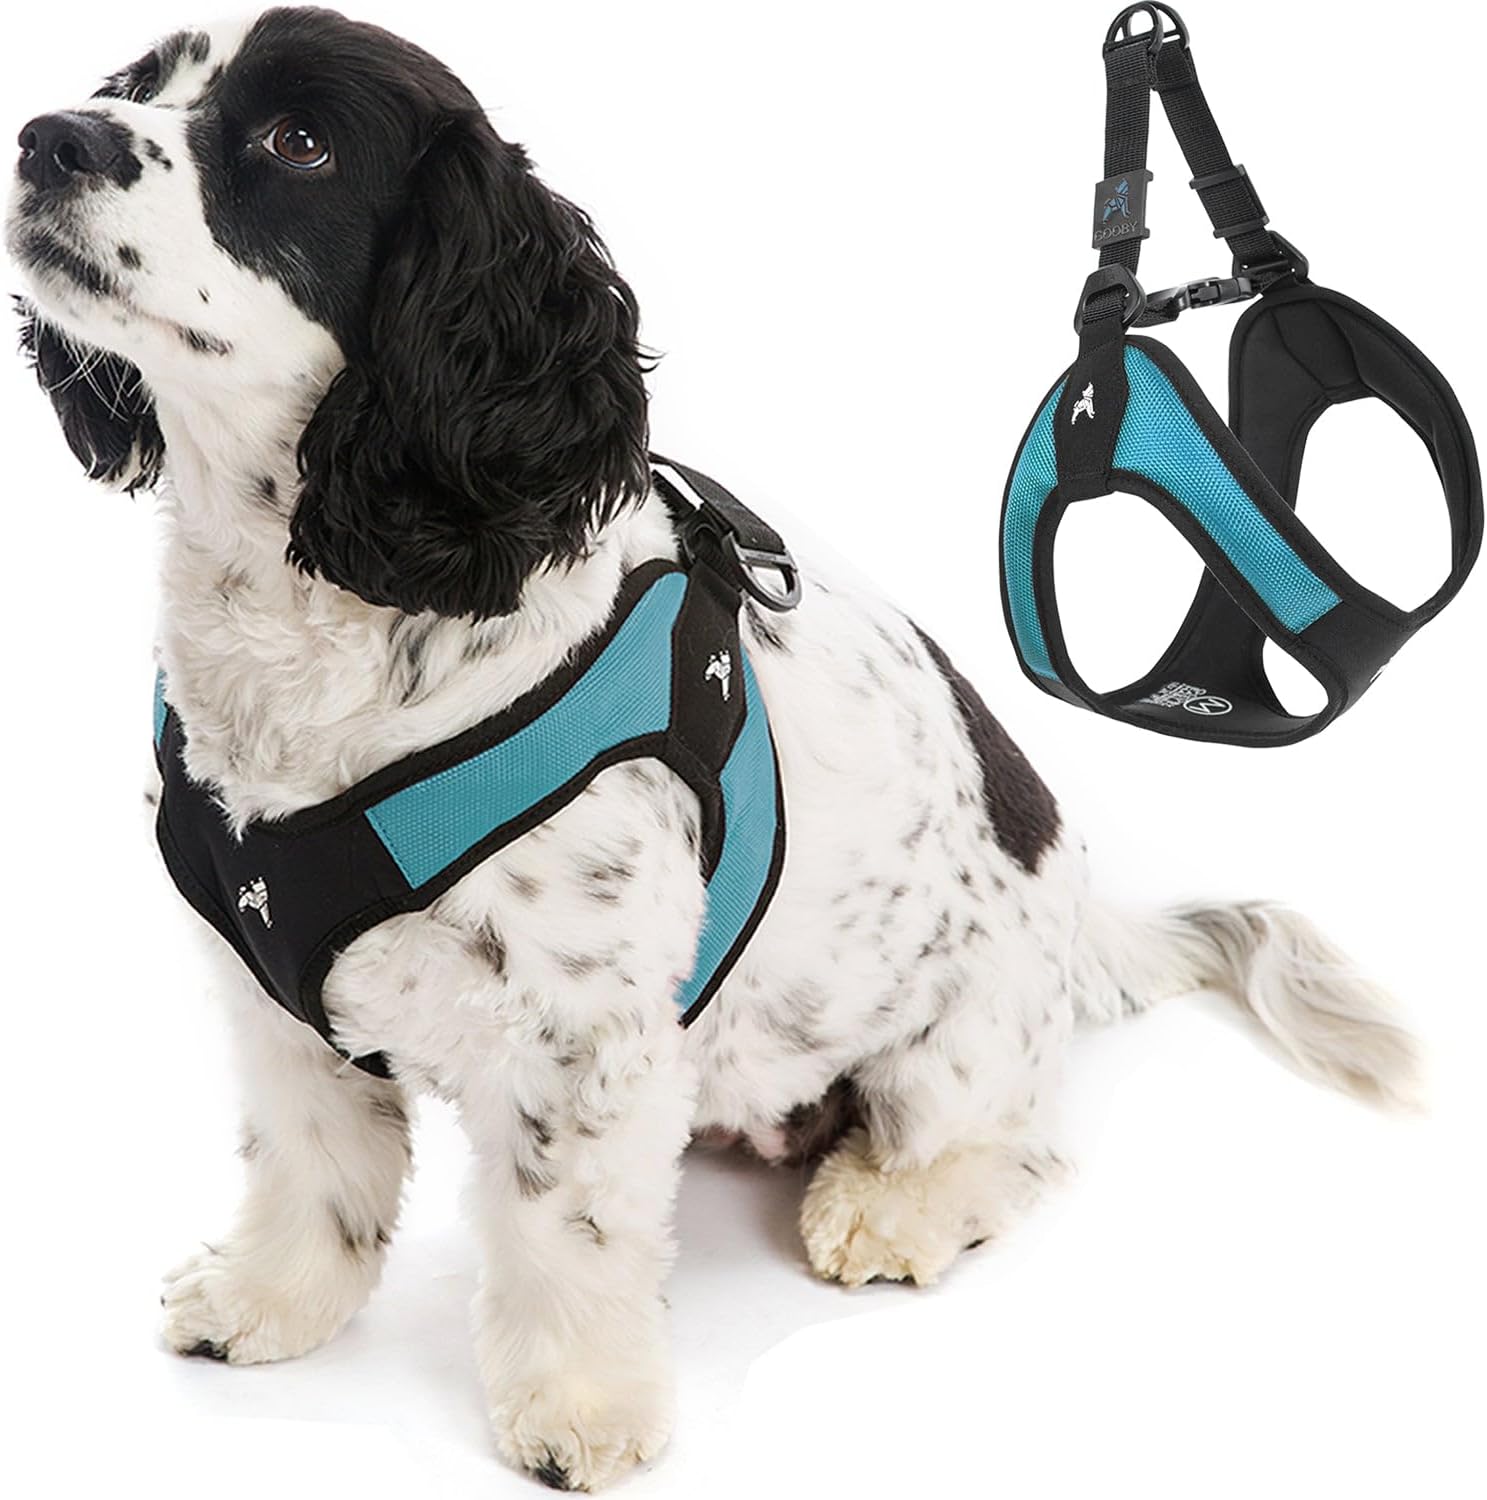
Step-in pick for small dogs: Gooby Escape Free Easy Fit Dog Harness, Step-in, Turquoise, Small
 Visit on Amazon →
Step-in harnesses get a bad reputation because cheap ones are basically two loops of webbing and a prayer. This one is built for a dog in the small range, and the reason I keep recommending it to clients with a puppy or a small adult is the shape of the chest panel. On a step-in, the dog plants both front feet and you pull the harness up, which means the strap has to sit behind the shoulder blades from the first second. On a dog with a narrow chest, that is the difference between a harness that stays put and one that rotates.
The turquoise color is a practical choice in the Pacific Northwest, by the way. I have watched cheap dye fade to gray in one wet winter, and a faded harness is one more thing owners stop looking at, which means they stop checking the fit.
The small size is genuinely small. Do not buy this for a dog over about 25 pounds, because you will be maxing out the adjustment range and a harness at the end of its straps has no room left when the webbing relaxes.
Flaws but not dealbreakers: Step-in designs are slower to put on a wiggling dog than an over-the-head harness, and there is no front clip here. This is a walking harness for a dog that is not a serious puller, or a young dog you are still teaching leash manners.
Anyone with a puppy or a small breed who wants a harness that goes on without a wrestling match should look here first.
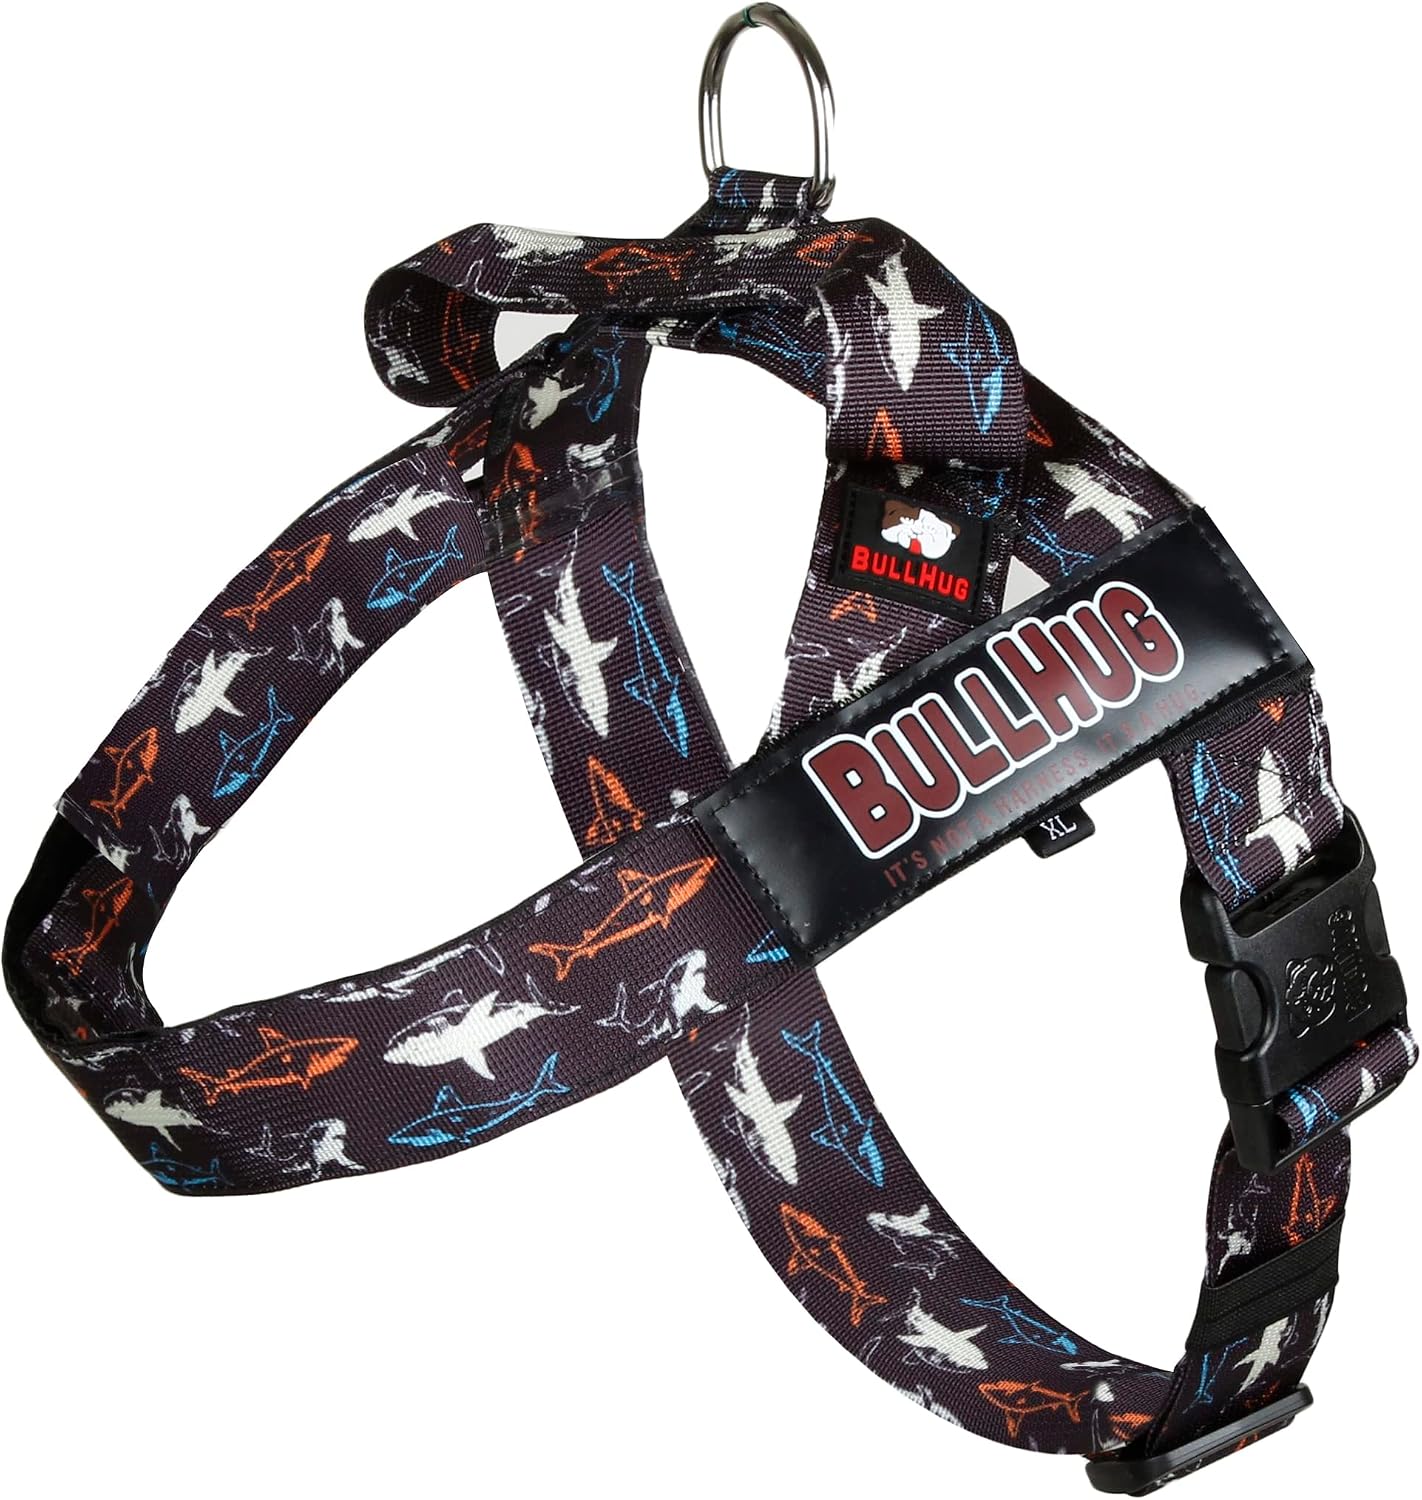
Broad-chested pick: BULLHUG Adjustable Dog Harness, No Pull, No Choke, for English Bulldogs, French Bulldogs, Pugs & Broad-Chested Breeds, Easy, Safe Walks (Shark, Medium)
 Visit on Amazon →
Broad-chested dogs break harnesses in a specific way. The chest is wide and the neck is thick, so a standard harness either strangles the throat or slides back and forth across the shoulders with every step. If your dog is a bulldog, a pug, or any mix with a barrel chest and a short back, the fit points on this harness are the ones that matter.
The design sits the straps around the chest rather than across the windpipe, and the adjustment range is generous enough that you can set the neck opening wide without running out of webbing. The medium is the size to measure for carefully, because on this body type the girth number is the only one that predicts anything.
The shark pattern is a print, not a structural feature, and I mention that because owners ask. What matters is the webbing and the hardware, and on a dog that pulls, those are the parts that decide whether you get a second season out of it.
Flaws but not dealbreakers: No harness fits every chest shape, and a very deep-chested dog may still need the chest strap shortened and rechecked after the first walk. Plan on a second adjustment session, not a single one.
Anyone with a broad-chested, short-backed dog who has given up on harnesses that rub the armpits should start here.
The fitting workflow, step by step
Do this indoors or in a driveway, not on a walk. You need both hands and a dog standing still.
Step one: Measure the girth, not the neck. Run a soft tape around the widest part of the ribcage, right behind the front legs. That number is your size. The neck measurement is a secondary check, and on broad-chested dogs it is almost useless, because the neck is often wider than the girth chart assumes.
Step two: Set the neck opening first. This is the strap most owners never touch, and it is the one that causes most of the rubbing. You want it snug enough that it does not slide down toward the shoulders during a walk, and loose enough that it does not press on the windpipe. Two fingers flat under the strap, no more.
Step three: Put the front clip at the sternum, not the throat. If your harness has a front attachment, it should sit low on the chest, roughly at the point where the neck meets the ribcage. A front clip that rides high pulls the dog's head sideways instead of redirecting the body. A clip that rides low turns a pull into a gentle turn.
Step four: Check armpit clearance. Slide a finger under the chest strap where it crosses the front leg. If the strap is sitting in the armpit crease, it will rub raw on a long walk. It should sit behind the shoulder blades, where the leg movement does not drag it.
Step five: Run the two-finger test at every point. Snug, not loose. A loose front-clip harness has to travel an inch before it loads, and that inch is the difference between a correction and a lunge. Loose is not kinder. Loose is what makes the harness fail.
Step six: Load test the hardware before you trust it. Clip the leash on, brace your feet, and pull firmly with both hands while watching the D-ring and the stitching. Nothing should flex or rotate. I have bent plastic D-rings with my thumb, and a buckle that flexes under hand pressure will not survive a seventy-pound dog hitting the end of a leash.
Step seven: Walk test in the driveway. Five minutes of figure eights and two hard stops, then look at the fit points again. The straps will have shifted. Re-tighten the neck strap and check the armpit clearance a second time.
Step eight: Recheck after the first wash. Webbing relaxes with water and use. If the padding has migrated or bunched, the harness will rub, and no amount of adjusting fixes sewn-in padding that has moved.
Sizing without a tape measure
If you do not have a soft tape, use a piece of string and a ruler, or a phone charging cable and a tape measure. What you cannot do is buy based on breed. I have fitted two German shepherds from the same litter into two different sizes. Breed charts are a starting point for a search, not a decision.
When your dog is between sizes, go up and use the adjustment range, not down. A harness that is slightly too large can be tightened at four points. One that is too small has nothing left to give.
The mistakes that undo a good fit
The first mistake is buying a harness and treating the adjustment as permanent. Every harness I own gets rechecked monthly, because webbing stretches and dogs change shape with the seasons.
The second is using a back-clip harness on a serious puller. A back clip gives a pulling dog a comfortable way to lean into the leash. That is a sled dog setup. Front clip or nothing for a dog that pulls.
The third is skipping training because the harness "fixed" the pulling. A harness reduces the force on the neck and gives you a mechanical advantage. It does not teach your dog anything. Use the harness to get control, then teach the walk.
The fourth is assuming one harness does everything. Most dogs need two: a walking harness and a car harness. The industry pretends one product covers both, and it does not.
What this all costs
Both of these harnesses sit in the range where I actually find winners, and neither requires you to pay for a logo. The step-in design runs in the mid-twenties and the broad-chest design runs in the high thirties. Check current Amazon price on each before you decide, since listings move.
Compare that to a professional fitting session, which is what I charge for a 45-minute appointment, and the math is obvious. The ten minutes you spend on the driveway is the cheapest training your dog will ever get.
The bottom line
A harness does not stop pulling. A harness that fits stops pulling, because it gives you leverage at the chest instead of the throat and it does not slide out of position when the dog hits the end of the leash. Measure the girth, set the neck strap first, put the front clip at the sternum, and load test the hardware with your own two hands before you trust it on a walk.
Then walk your dog. Recheck the fit next month. That is the whole job.